I shared with you my New Year’s resolutions several weeks ago. One of them was to learn calligraphy. I had a lesson several months ago, but before I could go to step two, I had to practice, practice, practice. Well needless to say, I have not had the next lesson. Our teacher said that we should practice lettering every day, even if we only have a few minutes, until it becomes natural. I am in awe when I watch her pen move on the paper and see the decorative letters that form.
Maybe it is my love of history that makes me want to learn calligraphy or my love of pen and ink. In our magazine Entertain Decorate Celebrate, there is a delightful article on calligraphy that I am sharing with you today.
The Essentials
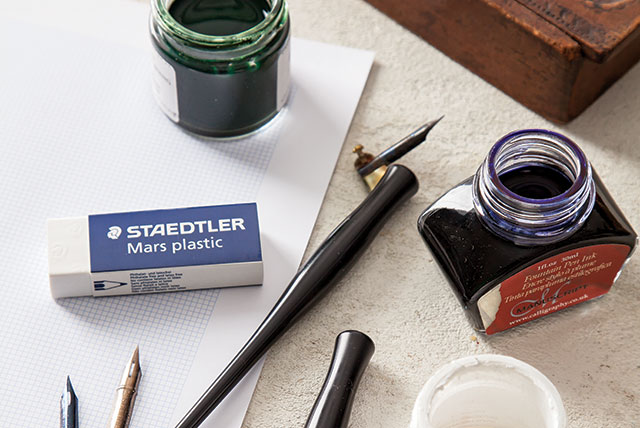
To get started, you’ll need a pointed nib, a straight holder, an oblique holder, a variety of inks, bleedproof marker paper, and, of course, a good eraser!
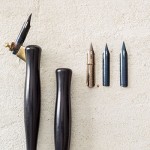
Choose a nib and a nib holder. Nib holders come oblique or straight. I use straight, but oblique helps some people get the angle of the nib right. My favorite nib is the Brause EF66, but a Nikko G, which is less flexible, might be more suitable for a beginner.
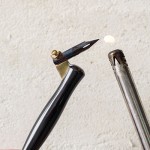
Place the nib in the holder, and then burn the nib with a lighter for a second or two to take off the chemical residue. (The residue keeps the ink from sticking to the nib.)
 Sit straight in your chair. Think about working from your elbow and your shoulder rather than from your fingers and your wrist. Hold your pen with an easy grip, without pressure and without squeezing your fingers tightly together. Hold the point of the nib perpendicular to the paper. Then bring your hand down to the paper, and let the pen fall to rest in your hand. That should create a good angle for nib to paper (roughly 45°) and position the pen correctly in your hand.
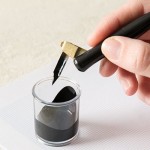
Dip your nib in ink (beyond the well or the opening in the middle of the nib), and begin with some practice strokes.
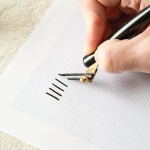
Start with downstrokes—little parallel lines going straight down. With the downstroke, you put pressure on the nib so that it creates a heavy line. The tines of the nib should separate to do this. Try some curved downstrokes.
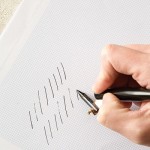
Now try upstrokes (you should use absolutely no pressure). This creates hairlines, or very thin lines. Diagonal bottom left to upper right is a good upstroke to try.

Now combine downstrokes and upstrokes to get the feel of actually forming letters. A wavy line is a good example. Or a curlycue. Repeat, repeat, repeat—that is the only way to get comfortable with the pen.
Once you feel comfortable with your downstrokes and upstrokes, you can try creating letters. I like to start beginners with a very basic, traditional alphabet and let them expand from there.
Have you tried calligraphy? I’d love to hear your stories!

Comments 25
What a joy to read about calligraphy in your blog and magazines. I am (trying to) teaching myself calligraphy. As “Having a Moment to Spare” in your Victoria January/February 2015 issue says, valuable lessons are learned, such as patience, perseverance, and self-discipline. Thank you for highlighting this beautiful skill. I look forward to many more wonderful articles!
I just received the best e-mail from Victorian Trading Co. called Letters Mingle Souls! All of you who have written here will love it! Under the tab WRITING & LITERARY is everything we need!
I have loved letters since I was in the lower grades. I tried to teach myself calligraphy and thought I knew what I was doing until I saw an evening course offered by our local college. A former nun was teaching Beginning Calligraphy so I signed up; that was 40+ years ago! I have been practicing this art since then and taught beginner’s calligraphy at the local high school’ adult ed classes for about 16 years. I still address envelopes for any occasion…
Where can I sell my calligraphy book?
Learned in middle school some 40 years ago. Only one semester and it has stuck with me always. Love to make beautiful things.
I love calligraphy! I began practicing calligraphy at the age of 12. I designed and wrote my own wedding invitations using my beginner calligraphy skills. The art of writing beautiful letters is a dying art form, but learning calligraphy is worth the time and effort. Steve Jobs once stated that the calligraphy skills he learned as a college student influenced the design of the iPad.
I was so fortunate to have learned calligraphy taught by a nun in Catholic high school ! I am 66 years old, have been a teacher and youth services administrator, mother and now an artist, I use this skill daily ..I simply enjoy the process of pen making easy ink markings, watching the ink flow…very meditative and calming. I still use a fountain pen with colorful inks in my journals and mixed media. Welcome to the world of beautiful colorful lettering!
Letterforms have always been fascinating to me. So when a few chances here and there presented themselves to take a class I signed up!
One of the best was a university course. One of those you can take without having to take an entire course load. For my final project I sketched out Samuel Whiskers and lettered out the recipe for his Roly-Poly Pancakes from Peter Rabbit’s Natural Foods Cookbook. It took several attempts to make it just right and I gave that version to my teacher. He and Samuel Whiskers are similar in stature so it became a nod of thanks to my wonderful teacher. And he just loved it. 🙂
If anyone is interested in pursuing this lovely art, it is best to find a class and make it a standing appointment. I find that once something is settled in my calendar, it is easier to actually do it! I would also not wait for time to practice, because most good classes will build some of that into the time schedule. Maybe an hour of instruction and another hour of putting it to practice.
Beware, once you start, it is addictive! And great fun to create your own style once the letterforms become familiar and you sort out your favorite pens and nibs. Writing notes with flair becomes second nature. Have fun!
My Dad learned many fonts, but he excelled in Old English, and is work was awesome. He would practice at night when all the children went to sleep, as it was quiet and no one touch the table or would spill ink. In the morning I would look at his beautiful work, and vow that I would learn the lovely art of calligraphy. Fast forward 15 years, and I took my first calligraphy course. Yes it is humbling, and taught me the art of patience, and of quieting the mind. My Dad gave me the best advise: Pick up the pen and practice 15 minutes every day to develop your hand – even a calligraphy magic marker will fit the bill. At first it was a struggle, but soon it became a challenge and a joy. I did eventually become a calligrapher for a print shop, was fluent in 35+ fonts and wrote many thousands of invitations over 25 years.
My Dad has since passed, and while cleaning out his old papers, found some “special checks” he calligraphed for and gave to each of the children. We all now cherish such wonderful keepsakes because it is my Dad’s original artwork. (I even found a few beautifully calligraphed checks written to the IRS – – imagine the smiles on those faces as they processed those checks ;-)))
Hi Phyllis! Yes, your instructor was correct in stressing the importance of practice in learning calligraphy. I have both practiced and taught calligraphy since the 1990s. I can admire anyone’s desire to use a “dip” pen. However, I have always started off my beginning students with basic bond paper (you don’t need to use calligraphy parchment just for practice. That can get a bit pricy) and a Sheaffer beginner calligraphy set. This set includes the pen, 3 nibs-broad, medium and fine, plus 4 different color ink cartridges. (Available at art supply stores and Michael’s Art and Crafts for under $15.) Once my students demonstrated both practice discipline and proficiency, they could move on to a dip pen if they so desired. I try to keep things simple in the beginning so students will be encouraged to continue on. Of course, everyone teaches differently. That’s the joy of learning from different instructors! As for the left-handeded ladies in the other comments, left-handed calligraphy supplies can be ordered off the internet, if they cannot be sourced locally. There are also specific books and videos especially geared for the left-handed calligrapher. Just google left handed calligraphy! I’m ambidextrous, so I also have left-handed calligraphy pens and nibs, as well as right handed. This helps me in being able to instruct left handers. There’s much more helpful material available now than when I first began in calligraphy. There are so many beautiful ink color choices available nowadays too! You can even lay down a watercolor paint wash on calligraphy or watercolor artist paper, and do your lettering over a beautiful pastel background! One of my most moving commissioned pieces was for a young man who had written the loveliest, romantic poem for his fiancée. After reading it, I remarked that any woman would be thrilled to read such loving heartfelt words. He sighed and told me she would never read his words. When I asked him why, he replied that she had died unexpectedly a few weeks before their wedding. He wanted to place his poem, done in calligraphy, in the casket with her. Through tear-filled eyes, I told him that I would be honored to do this poem for him. So you see, God can even use your gift of calligraphy to help others! You may be surprised at the ways this gift can be put to service to encourage others! In any case Phyllis, I’m always so glad at your efforts to keep alive the beautiful arts of a more gracious time! We so need these grace notes of loveliness in our harsh world! Blessings to all!
I did all my daughters wedding invitations in calligraphy. It was a lot of work and a lot of fun.
How marvelous. I am jealous. I must get practicing.
Always been a fan of this beautiful art…..it is so elegant and timeless. SO happy to see it alive and well!
Some of the most fun things to look at when I take out my art portfolio is the calligraphy projects I did. In those days calligraphy was required for us art majors. Calligraphy, with its many styles, is one more chance to give a special expression to a message.
Loved seeing this post on calligraphy! I, too, love calligraphy and beautiful hand lettering and this was just the prompt I needed to get my pens out and get started. Thank you so much!!!
My best friend and I took calligraphy in high school. I never went any farther but she has been perfecting the craft for the last 30 years. Every year since she married she has created the most beautiful Christmas cards. I cherish every one. When hurricane Katrina hit New Orleans and wiped out many of our memories, luckily the box with Debbie Fleming’s Christmas cards was spared. Maybe it was divine protection of such beauty.
After using a certain nib to practice, it gets rather worn to your angle and it’s hard to start another new pen. I have several pens, but mostly use the one I learned with.
Year ago I asked for a calligraphy set thinking I would learn while recuperating from surgery. I healed so quickly, thank goodness, I never even opened the kit. The ink is probably dried up but I am tempted by your post to attempt it. Thank you for your lovely reminders of rich and quiet ways of life.
I wrote to you when you posted your ink story and now here I am again. I love using my calligraphy pens as well as my nib ones, but I always just write in my normal writing, which isn’t not calligraphy. This past Christmas I wrote my Christmas letters in a beautiful calligraphy font and my 30 year old nephew said he couldn’t read it!!!!! I was shocked! I guess school just teaches them to write with no form. Now I feel thank goodness my 3 girls, who write very nicely, grew up using calligraphy and nib pens. As well we volunteered at our historic village of Ft. Steele when they were growing up and they learned to make pens with turkey feathers. Now my grandchildren ages 6 and 8, have gotten some feathers and wanted to make pens but I think I am going to head to Staples pick up that bottle of ink I’ve put off for the last 4 months and thanks to you, start them on their first lesson while they are still interested. Thank you for the great tips!
I started to take a class once, but didn’t get very far. You see I am left handed and the teacher was right handed. She could not teach me. So ended my class. I would love to learn some day.
I love calligraphy. it is a challenge for us lefties though, using a left-handed nib. Thanks for the incentive to pick up this lovely hobby again.
Calligraphy takes me back to a different world, the one I grew up in Europe, it was thought in school in those days, . A thing of the past and nearly forgotten in our fast paced life. So happy to know it is not entirely gone, still enjoyed by some. I have a very small collection left of beautiful writing instruments- fountain pens.
I have always wanted to learn. I was excited to read the article in your magazine! It inspired me even more to find someone that can teach this beautiful form of writing!
I calligraphed wedding invitations for my “spending money” in graduate school. Now that I am in my forties, it is such a joy to my life!!!!!
(I am very glad computer printer were not very proficient in fonts in the early 1990’s;-)
This is a wonderul post. One of my goals for 2015 is to learn calligraphy. Thanks for the great tips on getting started!